
219 lines
7.7 KiB
Markdown
219 lines
7.7 KiB
Markdown
<div align="center">
|
||
<img alt="pipecat" width="300px" height="auto" src="image.png">
|
||
</div>
|
||
|
||
# Pipecat
|
||
|
||
[](https://pypi.org/project/dailyai)
|
||
|
||
`pipecat` is a framework for building voice (and multimodal) conversational agents. Things like personal coaches, meeting assistants, story-telling toys for kids, customer support bots, and snarky social companions.
|
||
|
||
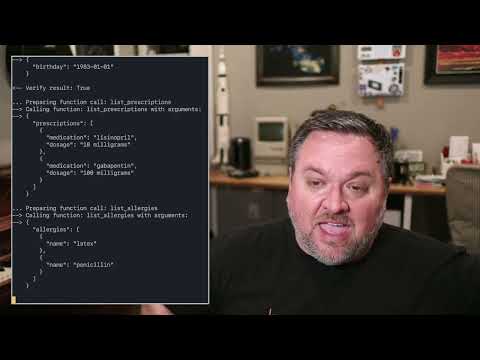
Build things like this:
|
||
|
||
[](https://www.youtube.com/watch?v=lDevgsp9vn0)
|
||
|
||
## Getting started with voice agents
|
||
|
||
You can get started with Pipecat running on your local machine, then move your agent processes to the cloud when you’re ready. You can also add a telephone number, image output, video input, use different LLMs, and more.
|
||
|
||
```shell
|
||
# install the module
|
||
pip install pipecat-ai
|
||
|
||
# set up an .env file with API keys
|
||
cp dot-env.template .env
|
||
```
|
||
|
||
By default, in order to minimize dependencies, only the basic framework functionality is available. Some third-party AI services require additional dependencies that you can install with:
|
||
|
||
```shell
|
||
pip install "pipecat-ai[option,...]"
|
||
```
|
||
|
||
Your project may or may not need these, so they're made available as optional requirements. Here is a list:
|
||
|
||
- **AI services**: `anthropic`, `azure`, `fal`, `moondream`, `openai`, `playht`, `silero`, `whisper`
|
||
- **Transports**: `daily`, `local`, `websocket`
|
||
|
||
## A simple voice agent running locally
|
||
|
||
If you’re doing AI-related stuff, you probably have an OpenAI API key.
|
||
|
||
To generate voice output, one service that’s easy to get started with is ElevenLabs. If you don’t already have an ElevenLabs developer account, you can sign up for one [here].
|
||
|
||
So let’s run a really simple agent that’s just a GPT-4 prompt, wired up to voice input and speaker output.
|
||
|
||
You can change the prompt, in the code. The current prompt is “Tell me something interesting about the Roman Empire.”
|
||
|
||
`cd examples/getting-started` to run the following examples …
|
||
|
||
```shell
|
||
# Talk to a local pipecat process with your voice. Specify GPT-4 as the LLM.
|
||
|
||
export OPENAI_API_KEY=...
|
||
export ELEVENLABS_API_KEY=...
|
||
python ./local-mic.py | ./pipecat-pipes-gpt-4.py | ./local-speaker.py
|
||
```
|
||
|
||
## WebSockets instead of pipes
|
||
|
||
To run your agent in the cloud, you can switch the Pipecat transport layer to use a WebSocket instead of Unix pipes.
|
||
|
||
```shell
|
||
# Talk to a local pipecat process with your voice. Specify GPT-4 as the LLM.
|
||
|
||
export OPENAI_API_KEY=...
|
||
export ELEVENLABS_API_KEY=...
|
||
python ./local-mic-and-speaker-wss.py wss://localhost:8088
|
||
```
|
||
|
||
## WebRTC for production use
|
||
|
||
WebSockets are fine for server-to-server communication or for initial development. But for production use, you’ll need client-server audio to use a protocol designed for real-time media transport. (For an explanation of the difference between WebSockets and WebRTC, see [this post.])
|
||
|
||
One way to get up and running quickly with WebRTC is to sign up for a Daily developer account. Daily gives you SDKs and global infrastructure for audio (and video) routing. Every account gets 10,000 audio/video/transcription minutes free each month.
|
||
|
||
Sign up [here](https://dashboard.daily.co/u/signup) and [create a room](https://docs.daily.co/reference/rest-api/rooms) in the developer Dashboard. Then run the examples, this time connecting via WebRTC instead of a WebSocket.
|
||
|
||
```shell
|
||
# 1. Run the pipecat process. Provide your Daily API key and a Daily room
|
||
export DAILY_API_KEY=...
|
||
export OPENAI_API_KEY=...
|
||
export ELEVENLABS_API_KEY=...
|
||
python pipecat-daily-gpt-4.py --daily-room https://example.daily.co/pipecat
|
||
|
||
# 2. Visit the Daily room link in any web browser to talk to the pipecat process.
|
||
# You'll want to use a Daily SDK to embed the client-side code into your own
|
||
# app. But visiting the room URL in a browser is a quick way to start building
|
||
# agents because you can focus on just the agent code at first.
|
||
open -a "Google Chrome" https://example.daily.co/pipecat
|
||
```
|
||
|
||
## Deploy your agent to the cloud
|
||
Now that you’ve decoupled client and server, and have a Pipecat process that can run anywhere you can run Python, you can deploy this example agent to the cloud.
|
||
|
||
`TBC`
|
||
|
||
## Taking it further
|
||
|
||
### Add a telephone number
|
||
Daily supports telephone connections in addition to WebRTC streams. You can add a telephone number to your Daily room with the following REST API call. Once you’ve done that, you can call your agent on the phone.
|
||
|
||
You’ll need to add a credit card to your Daily account to enable telephone numbers.
|
||
|
||
`TBC`
|
||
|
||
|
||
### Add image output
|
||
|
||
Daily supports telephone connections in addition to WebRTC streams. You can add a telephone number to your Daily room with the following REST API call. Once you’ve done that, you can call your agent on the phone.
|
||
|
||
You’ll need to add a credit card to your Daily account to enable telephone numbers.
|
||
|
||
`TBC`
|
||
|
||
### Add video output
|
||
|
||
|
||
`TBC`
|
||
|
||
|
||
## Code examples
|
||
|
||
There are two directories of examples:
|
||
|
||
- [foundational](https://github.com/daily-co/pipecat/tree/main/examples/foundational) — examples that build on each other, introducing one or two concepts at a time
|
||
- [starter apps](https://github.com/daily-co/pipecat/tree/main/examples/starter-apps) — complete applications that you can use as starting points for development
|
||
|
||
Before running the examples you need to install the dependencies (which will install all the dependencies to run all of the examples):
|
||
|
||
```
|
||
pip install -r {env}-requirements.txt
|
||
```
|
||
|
||
To run the example below you need to sign up for a [free Daily account](https://dashboard.daily.co/u/signup) and create a Daily room (so you can hear the LLM talking). After that, join the room's URL directly from a browser tab and run:
|
||
|
||
```
|
||
python examples/foundational/02-llm-say-one-thing.py
|
||
```
|
||
|
||
## Hacking on the framework itself
|
||
|
||
_Note that you may need to set up a virtual environment before following the instructions below. For instance, you might need to run the following from the root of the repo:_
|
||
|
||
```
|
||
python3 -m venv venv
|
||
source venv/bin/activate
|
||
```
|
||
|
||
From the root of this repo, run the following:
|
||
|
||
```
|
||
pip install -r dev-requirements.txt -r {env}-requirements.txt
|
||
python -m build
|
||
```
|
||
|
||
This builds the package. To use the package locally (eg to run sample files), run
|
||
|
||
```
|
||
pip install --editable .
|
||
```
|
||
|
||
If you want to use this package from another directory, you can run:
|
||
|
||
```
|
||
pip install path_to_this_repo
|
||
```
|
||
|
||
### Running tests
|
||
|
||
From the root directory, run:
|
||
|
||
```
|
||
pytest --doctest-modules --ignore-glob="*to_be_updated*" src tests
|
||
```
|
||
|
||
## Setting up your editor
|
||
|
||
This project uses strict [PEP 8](https://peps.python.org/pep-0008/) formatting.
|
||
|
||
### Emacs
|
||
|
||
You can use [use-package](https://github.com/jwiegley/use-package) to install [py-autopep8](https://codeberg.org/ideasman42/emacs-py-autopep8) package and configure `autopep8` arguments:
|
||
|
||
```elisp
|
||
(use-package py-autopep8
|
||
:ensure t
|
||
:defer t
|
||
:hook ((python-mode . py-autopep8-mode))
|
||
:config
|
||
(setq py-autopep8-options '("-a" "-a", "--max-line-length=100")))
|
||
```
|
||
|
||
`autopep8` was installed in the `venv` environment described before, so you should be able to use [pyvenv-auto](https://github.com/ryotaro612/pyvenv-auto) to automatically load that environment inside Emacs.
|
||
|
||
```elisp
|
||
(use-package pyvenv-auto
|
||
:ensure t
|
||
:defer t
|
||
:hook ((python-mode . pyvenv-auto-run)))
|
||
|
||
```
|
||
|
||
### Visual Studio Code
|
||
|
||
Install the
|
||
[autopep8](https://marketplace.visualstudio.com/items?itemName=ms-python.autopep8) extension. Then edit the user settings (_Ctrl-Shift-P_ `Open User Settings (JSON)`) and set it as the default Python formatter, enable formatting on save and configure `autopep8` arguments:
|
||
|
||
```json
|
||
"[python]": {
|
||
"editor.defaultFormatter": "ms-python.autopep8",
|
||
"editor.formatOnSave": true
|
||
},
|
||
"autopep8.args": [
|
||
"-a",
|
||
"-a",
|
||
"--max-line-length=100"
|
||
],
|
||
```
|